Wednesday, June 27, 2012

DIY Wednesday: Sugar Lip Scrub

Summer is in full swing and I figured that this do-it-yourself is super appropriate. I love Summer for many reasons: laying out, day drinking, boating, etc. However, this awesomeness has one downfall.. the sun absolutely loves to just suck the moisture right out of my lips. This lip scrub tutorial brought to you by Honestly... WTF is sure to save your lips from the unforgiving dry Summer heat.


You’ll need:

  • pure coconut oil
  • honey
  • brown sugar
  • a teaspoon
  • a tablespoon
  • a mixing bowl
  • an empty jar or 2.5 oz baby food jar
  • labels (optional)

Make sure that the coconut oil is solid enough to scoop up but soft enough for a spoon to dig in. If the coconut oil is too oily, stick it in the fridge for 10-20 minutes. If the coconut oil is too hard, place it into a sink filled with hot water for 5-10 minutes or until soft. Combine one well-rounded tablespoon of coconut oil with one tablespoon of honey into the bowl. Besides smelling and tasting incredible, coconut oil is actually an amazing natural ingredient for skin and body products. The oil contains fatty acids and antioxidants that moisturize and nourish the skin while honey contains cleansing and healing properties and is a natural binder.


Mix the coconut oil and honey until they bind together. The consistency should look like thick honey-comb honey. Make sure to mash up all of the coconut lumps so that the mixture is clump-free. This will serve as the base of the scrub.


Add two hand packed teaspoons of brown sugar and fold it into the base. Brown sugar not only tastes fantastic, it is also a great natural exfoliant because it’s not too harsh and leaves skin soft to the touch. All of the brown sugar should be coated in the coconut oil and honey base.


Add one teaspoon of just the oil from coconut oil jar into the bowl. This will help smooth out the mixture and make the scrub extra moisturizing. Transfer the scrub from the bowl into a small jar or container.


The edible scrub will last up to 2 weeks if refrigerated. Before using, allow the scrub to stand at room temperature for a good 10 minutes so that the formula softens a bit. Apply scrub to lips in small, circular motions for 1-2 minutes and rinse off with a warm washcloth. Congratulations – you are now armed with a soft, moisturized, and plump pout. Pucker up!


Images via Honestly... WTF

Monday, June 25, 2012

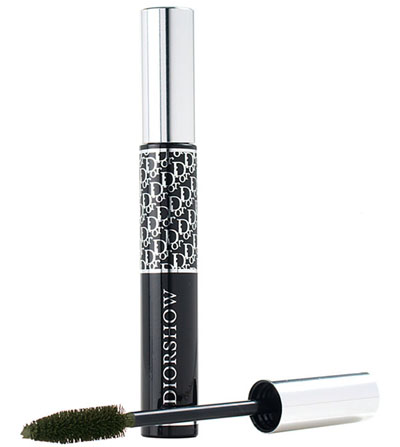
Make Up Your Mind Monday: Dior Show Mascara

Probably the item in my make-up bag that I spend the most on... MASCARA! I simply cannot live without mascara and I have probably tried over 30 different types of it.. not an exaggeration.


I mean, what's not to love about this? Most of us can't afford to have Dior hanging in our closets, so why not splurge to have it in our make-up bags?! Not only is the packaging amazing, but the actual product itself is brilliant. The fabulously thick brush allows an even coat, without the flaking! I cannot tell you how many compliments I have received on my lashes and I owe it all to this masc! While the price seems a little out of control (somewhere around the $25 mark), this mascara is completely worth it. Drug store mascaras dry out quickly and I go through a tube probably within the week. Dior lasts and let's face it, it's Dior! So next time you feel like splurging, stop by your nearest department store and pick up this gem. You won't regret it.

Wednesday, June 20, 2012

DIY Wednesday: Wrapped Headphones

So pumped I ran into this DIY on Free People's blog. Music is my life and I cannot wait to dress up my beats! Super easy DIY... a lil fashion combined with music.. umm, amazing.


What you need: headphones, embroidery thread and scissors

Step 1Select which colors, and how many, you want to use. Cut them longer than the headphone cord – you always need more than you think! Knot them around the headphone cord.

Step 2Pick whatever color you want to start with and begin making “four” knots. Cross the thread as seen above, and then pull up towards the top to create your knot. Repeat this as many times as you want with each color.


That’s all there is to it! Now you’ve got a colorful new pair of headphones!


Photos/DIY tutorial courtesy of Free People's blog