
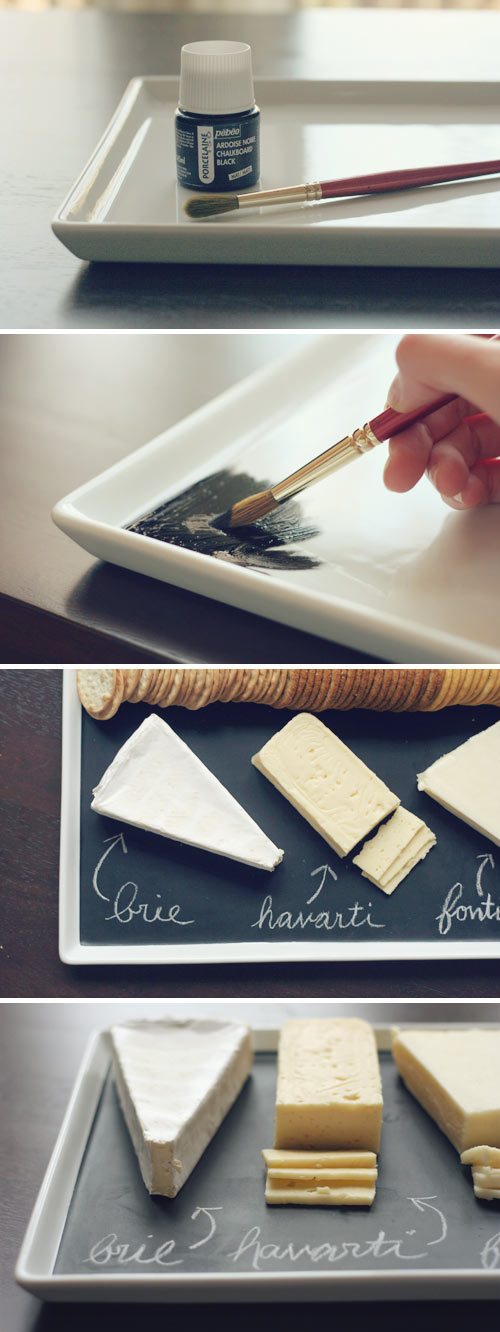
You will need:-a porcelain platter
-painter’s tape (optional)
-Pebeo Porcelaine 150 Chalkboard Paint
(Don’t use regular chalkboard paint. This only works with porcelain paint.)
-a soft bristle paint brush (a watercolor brush works well)
-a regular kitchen oven
Directions:
1. Make sure your platter is clean and dry.
2. If desired use painter’s tape to mask off the edges of the platter, otherwise skip the tape and freehand it.
*Please note that this particular porcelain paint says it’s not recommended for surfaces that come in contact with food. Consider yourself warned. It’s water based and non-toxic, so I don’t see the harm in placing some cookies or cheese and crackers on it.
4. Apply the paint with a soft bristle brush. You will be able to see the brush strokes after the paint dries, so be careful and keep your strokes even. I ended up applying two thin coats of paint (allow the first coat to dry completely before applying the second).
5. As soon as you are done painting carefully remove the tape if you used it. If you remove it before the last coat of paint dries, the tape will be less likely to peel up the edges of the paint.
6. Let the paint dry for 24 hours. Then, bake your platter following the instructions printed on the back of the paint bottle. After baking turn off the oven and leave the platter inside until it has gradually cooled to room temperature. After you bake it the paint is dishwasher and microwave safe.
No comments:
Post a Comment